Barcodes to find backups and files on disks, DVDs, etc.
If you regularly archive files — photos, videoclips, fonts, receipts, documents, etc. — on an external tape drive, hard drive, Blu-Ray, M-Disc or thumb drive, how can you ensure you’ll quickly find which media holds that one file you need? A barcode makes that easy.
First, you’ll need to think of a labelling strategy. If you’d want to create an archive of your photos, for example, you could save images of your children to one DVD and those of the dog to another. A numbering scheme might then look like this: CH2010-1, which would correspond to “Children in 2010, disc 1”.
Some backup software automatically stamps media with a prefix that identifies the media type and an incrementing number. For example, if the media is a 4mm tape, then the prefix would be 4M, followed by 0001. The next media label for a fresh 4mm tape would be 4M0002, and so on.
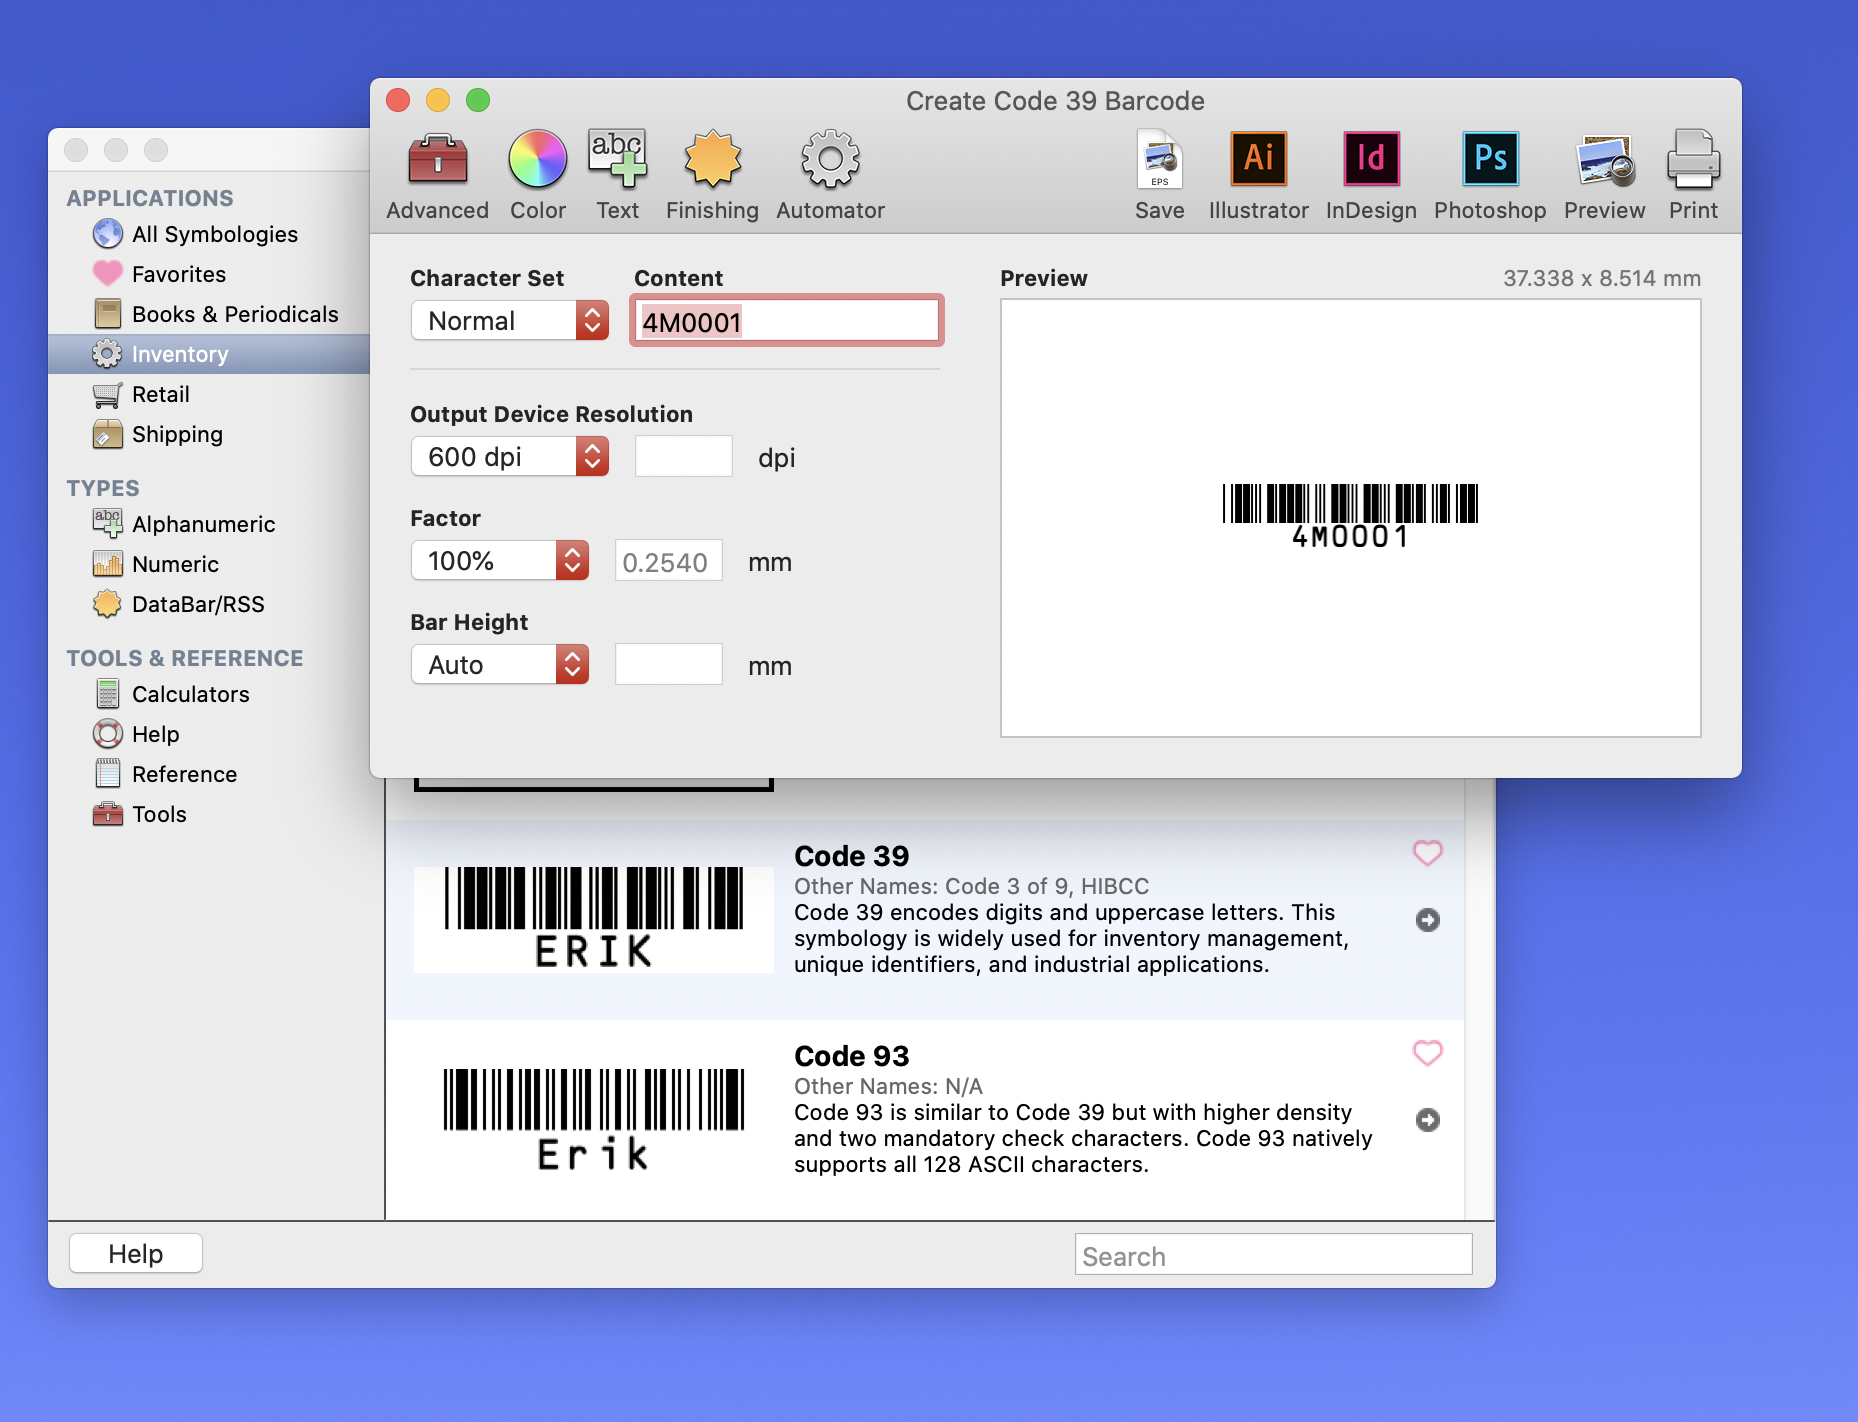
You can easily create barcodes for individually as well as incrementally numbered labels with Barcode Producer and the Automator module. Start by launching Barcode Producer and select either Code 39 or Code 93 if your label will be short and contain alphanumeric characters. If your naming scheme is extensive, choose a QR Code.
In the step-by-step instructions below, we’re using Code 39 and the tape media naming scheme from the example above.
Single label workflow

If you’re going to print only one label, enter the characters in the Content field. When finished, click the Print button to instantly print the barcode, save to disk, or save directly to one of the apps by clicking the corresponding icon.
Multiple labels workflow
Step 1
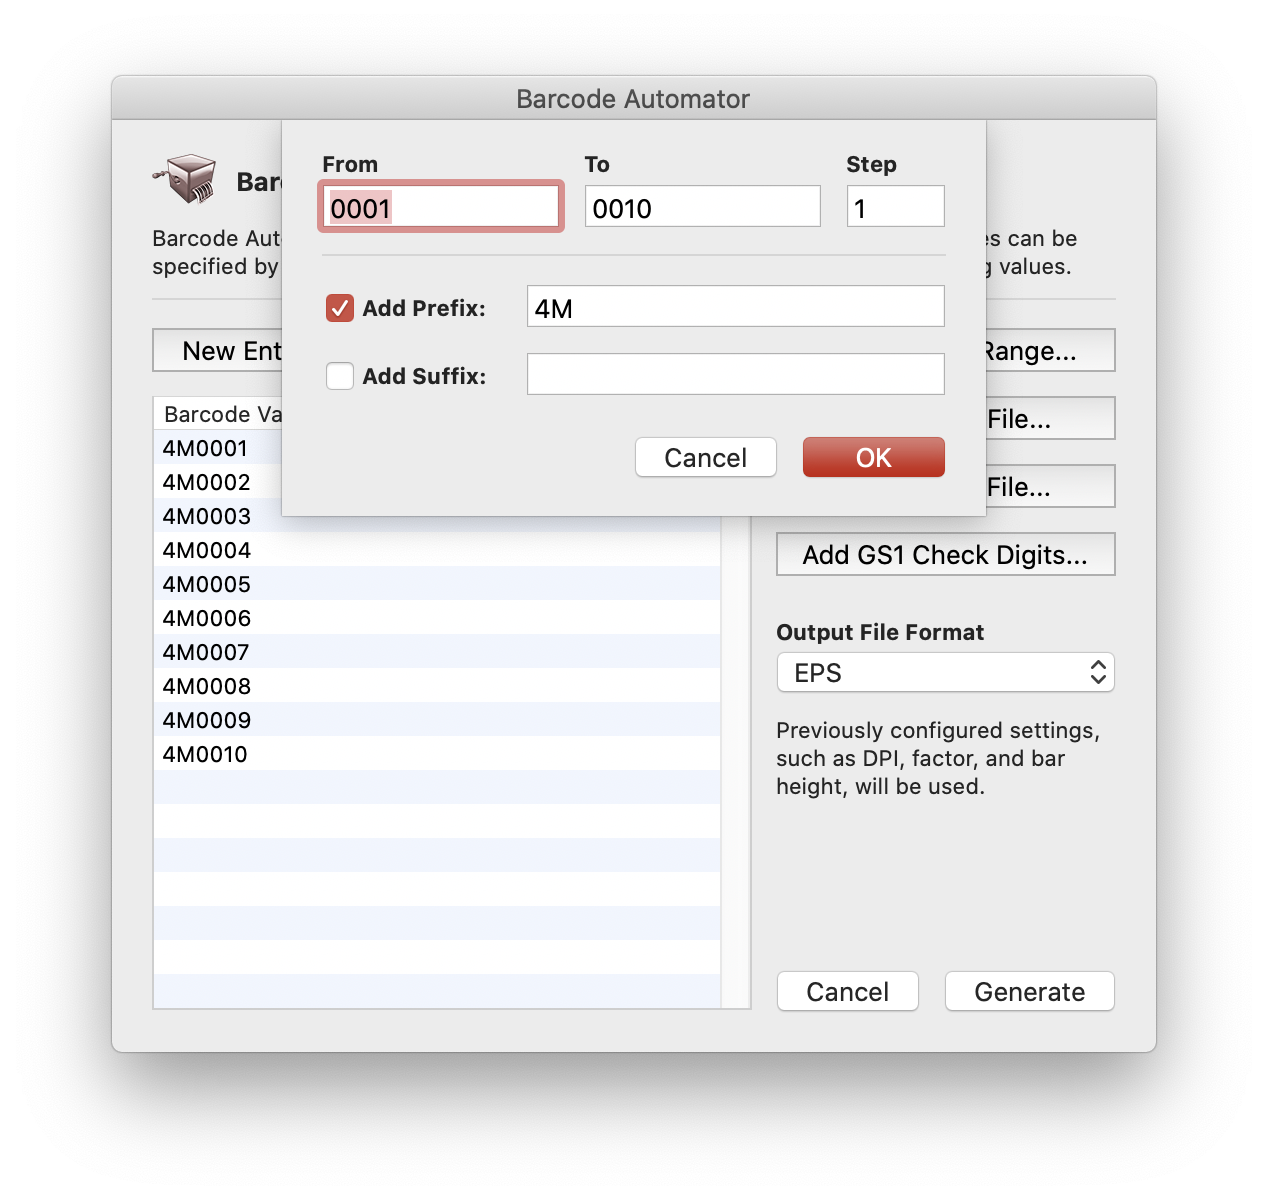
If you’re going to print multiple — let’s say 10 for this tutorial — labels at once, first check your output settings (DPI, Factor and Bar Height) and when you’re satisfied, click the Automator icon. In the Automator panel click the Add Numeric Range button. In the From field type 0001 as the start value and 0010 as the end value. Then check the Add Prefix checkbox and add “4M”. Click OK.

Step 2
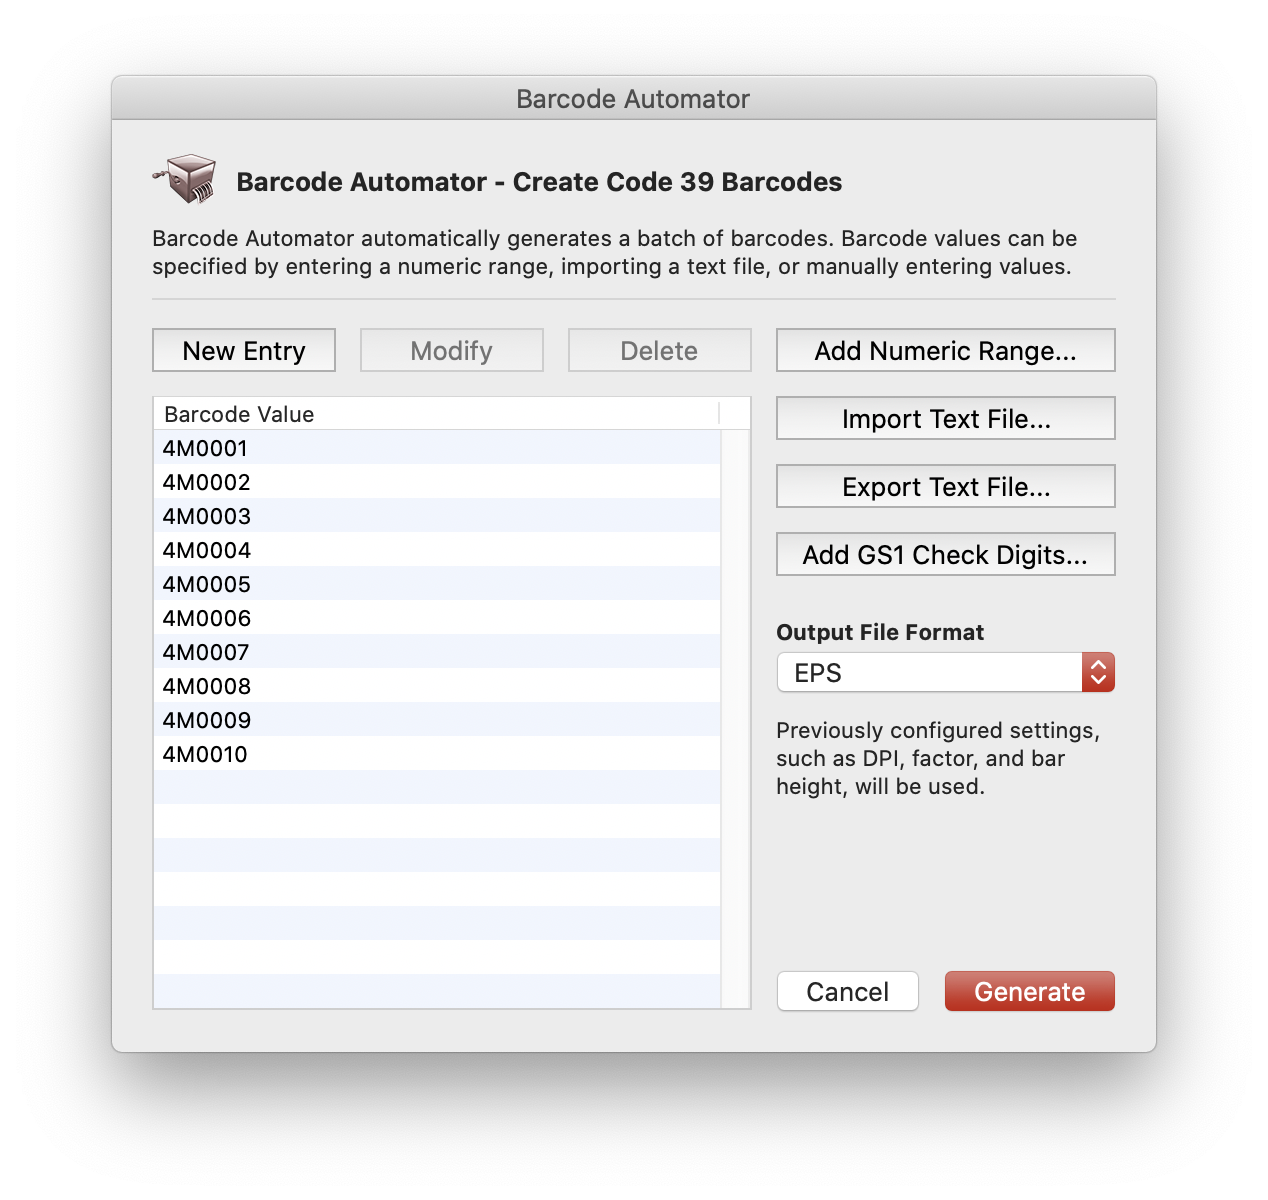
From the Output File Format dropdown menu, select your preferred output format (EPS, PDF or TIFF) and click the Generate button. Your barcodes will be created in the folder you selected. For best print results from a layout or vector graphics app, select EPS or PDF.

Step 3
Click the Generate button and select a destination folder from the window.
You can now print the barcodes from within an editing app and stick them to the respective media.
And what with QR Codes?
The procedure is the same with QR Codes, except you need to select “Text” from the Application dropdown menu and enter the text in the Content field if you’re going to create one barcode.

If you’re going to create multiple barcodes, use Automator again, but instead of clicking “Add Numeric Range”, select the “Import Text File” button. Create a text file (make sure the extension is .txt) with the media names, one per line, and import the file in Automator.

Your barcodes will be created in the folder you selected.

Finding the media that hold your files
You can use a database app such as FileMaker or a dedicated management app like DiskCatalogMaker for media or Adobe Lightroom for images to find the files you’re looking for. A spreadsheet or even a text editor like BBEdit will work too.
There’s one thing that you must keep in mind: every media in your database must either have the same name as the barcode or the entry must have a searchable field — keywords, tags, free text — that you can add the code to so you can later find what’s on the disc, tape or thumb drive by scanning the barcode with your cursor in the search field of your management application or backup program. Most industry standard USB barcode readers, like IntelliScanner Pro, will type the barcode directly into the search field without the need for special drivers.


